Crispy Chicken Fingers with Honey Mustard Dipping Sauce

and cinnamon carrot"fries"

Vegan
Gluten-Free
Kid Friendly
Vegetarian
Dairy Free

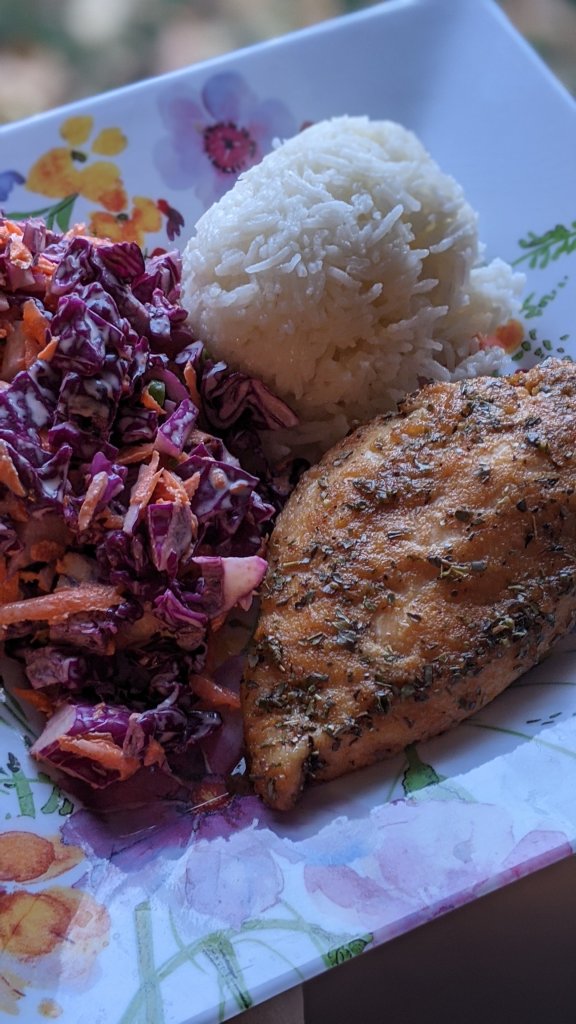
Title: Crispy Chicken Fingers
Author: Britney Shawley
Recipe type: Dinner
Prep time: 5 minutes (rest time 10 minutes to 48 hours)
Cook time: 15 to 30 minutes 
Total time: 35 minutes
Serves: 3 people 

I made this meal for my family and they praised me for hours!!! Cooking is not about praise, its about love. But it helps when your family loves a meal so much they cannot stop talking about how much they love it.


This meal was very quick. About 15 minutes for the chicken in the oven, and 30 minutes for the carrot fries. It was simple to put together and supremely delicious and nourishing. I guarantee this will be on  your weekly rotation!!
Read comments below this recipe

Ingredients

Crispy Chicken Fingers

3 large chicken breasts, dethawed
Batter:
2 eggs
4 tbsp flour (I used whole grain)
3 tbsp Dijon Mustard
2 tbsp Mayo
1 tbsp Oil
Pinch of Pepper
Pinch of salt
Breading:
2 cups breadcrumbs (1/2 spelt crumbs + 1/2 regular panko crumb)

1 tsp salt
2 tsp garlic powder

Honey Mustard Dipping Sauce
1/3 cup mayo (and/or thick plain yogurt like Greek or Kefir!)

2 tbsp Dijon Mustard
2 tbsp honey, raw
1/4 tsp turmeric
1-2 tsp lemon
salt and pepper to taste

Cinnamon Carrots

4-5 medium carrots
1 tsp cinnamon
1 tsp salt
Pinch or two of sugar (coconut )
Pinch Pepper
Olive Oil, drizzle
 

Instructions

Cinnamon Carrot Sticks

  1. Preheat oven to 420F
  2. Peel and dice your carrots into sticks.
  3. Add them to a baking pan with parchment paper
  4. Drizzle olive oil, sprinkle salt and cinnamon
  5. Use your hands to massage the spices on the carrots covering all parts of carrots
  6. Pop into preheated oven
  7. Bake for approx 35 minutes until slightly crispy


Crispy Chicken Fingers

  1. Preheat oven to 420F
  2. Mix the batter: eggs, flour, mustard, mayo, oil, pepper, salt
  3. Dice your chicken breast into strips and soak in the batter for 15 minutes to 48 hours (in fridge)
  4. Prepare your breading: crumbs, salt, garlic powder
  5. Take each strip of chicken and press it into the breading on one side, then flip it and press into breading on the other side. Ensuring to cover all side of the chicken with the breading.
  6. Once battered and breaded add the chicken strips to a baking pan that has parchment paper on it (I will often put a cooling rack on top of the pan, and place the chicken strips on the cooling rack when baking in oven)
  7.  Bake for 15 minutes until cooked through
Honey Mustard Dipping Sauce
  1. In a medium bowl mix mayo (kefir), dijon, honey, turmeric, lemon, salt and pepper. Mix together and set aside.

Saving Money:

Buy your chicken from a quality source. It costs a bit more up front, but you are saving in health, in taste and in money long term. We buy all our meat from @ButcherBox . Its high quality meat that is pastured, loved and delicious!  Its worth the little bit of extra money to save on health for us, the animals and the environment.

Quick Tips & Tools:

Tools:

3 medium bowls, knife, cutting board (for chicken), 2 baking pans, cooling rack
 

Tips:

Make sure you take all your ingredients out on the counter before you begin to ensure that you are not running around the kitchen like a chicken with your head cut off. No pun intended 😉
 Careful not to over cook chicken. Thicker slices may take up to 20 minutes, but no more than that or they will be dry.
 
The salad you see above is mixed salad greens with a balsamic glaze dressing.
 
I enjoy mixing bread crumbs to make the perfect crumb. I use spelt crumb and regular flour crumb.
 
Thank you to my friend Mama Jane in California that I first learned to make amazing chicken fingers with and also the blog https://www.recipetineats.com/ for added inspiration.
 

Saving Time:

Normally when breading chicken you will dip it into eggs, then flour, then crumb. However, I am a fan of saving time!!! So I put the eggs and flour (with dijon and mustard for flavor) together. Because the batter is made this way you can let your chicken strips rest in the batter for up to 48 days!  This makes it a great meal for Meal Prepping!!! Leave the chicken strips in batter until you are ready to cook. Then take the chicken and add to the breading and then lay it out on pan to bake.
 

Set Your Intention:

I am Love. And I welcome Love to flow through me and into this meal, to greatly nourish and bless all who eat it.

Want to Up-level your Health & Well-being?

Book a free 20 Minute Consult with Me

Fill out this form and I will reply with possible dates for our consultation / breakthrough session

1 on 1 Coaching
for Body Mind Spirit.

Fill out this form and I will reply with possible dates for our first meet. 🙂

Kitchen Alchemy Course

Up-level your attitude and home kitchen, and become part of our Kitchen Alchemy Family.

You may also enjoy these recipes...

BLT Pasta Salad
Get The Recipe

Red lentil Raw Vegetable Wraps
Get The Recipe

Marinated Chicken Breast
Get The Recipe